Yes, I made chili in July! My husband really wanted some, even though it is like 105 degrees outside. Instead of a beef chili, I decided to try White Chicken Chili, which I have never made before. We really liked this dish and I can imagine that we will eat it more in the winter months.
While I try to use spices and herbs to season soups/stews/chili, I decided for the first time making this dish I would try the pre-packaged seasoning packet. The recipe on the seasoning packet sounded good, but I added a couple of things to make it heartier and give it some flare. Since chili is usually quite filling, I only served some chili in a bowl and some fresh, diced watermelon chunks on the side. This dish was very easy to prepare and didn't take hardly any time at all, which is always nice when you get home from a long day of work.
White Chicken Chili
Serves 4 - 1 cup servings
Ingredients:
1 tablespoon canola oil or olive oil
Pepper to season the chicken breasts chunks
1 packet McCormick's White Chicken Chili seasoning packet
1 pound boneless skinless chicken breasts - diced in small squares
1 cup of water
1 15oz can white beans (undrained) - I used Bush's Great Northern Beans
1 4oz can fire roasted diced green chiles (undrained)
1 15oz can Del Monte Diced tomatoes with green peppers and onions (drained)
3/4 cup frozen corn kernels - canned would work also, but make sure you drain it to remove a lot of the sodium.
Suggested Toppings: reduced fat or fat free sour cream, fresh avocado slices, diced jalapenos, low fat shredded cheese, salsa, lettuce, or onions
Directions:
-In a large saucepan or skillet, add oil and heat on medium high heat.
-Add seasoned boneless chicken chunks and cook until done (took about 8 minutes to cook them)
-Add seasoning packet, water, white beans, green chiles, diced tomatoes, and corn to the saucepan and stir well.
-Bring to a boil and then cover and simmer for 15 minutes on low
-Pour approx 1 cup in a bowl and top with whatever toppings you desire. (I topped mine with a small dallop of fat free sour cream and some salsa, while Bryan topped his with shredded fat free cheese)
*Suggestions
-Next time we make this, we are going to experiment and use a can of black beans instead of white beans. I'll have to let you know how it goes.
Happy Eating! :)
Friday, July 29, 2011
Wednesday, July 27, 2011
"Healthified" Chocolate and Strawberry Dessert Nachos
I decided to make this recipe for dessert tonight. We had a few leftover flour tortillas and I wanted to use them before they go bad. Cheeseburger in Paradise has a dessert called Chocolate Nachos. I've never had them but I have seen others order them. My inspiration came from this dessert.
"Healthified" Chocolate and Strawberry Dessert Nachos
Serves 2
Ingredients:
*low carb flour tortillas - medium sized (we used low carb whole wheat tortillas, but I realize that most will think that is gross for a dessert)
*1/2 tablespoon melted light butter
*1 teaspoon ground cinnamon
*1 teaspoon sugar or sugar substitute - we used Splenda
*Diced fresh strawberries - about 1/2 cup per serving, so 1 cup for 2 servings
*Chocolate Syrup - we used Hershey's Sugar Free Chocolate Syrup
*Lite or Fat Free Whipped Cream
Directions:
-Preheat oven to 350 degrees.
-Take flour tortillas and brush some melted butter on them
-Sprinkle cinnamon and sugar on the tortillas
-Take a knife or pizza cutter and cut tortillas into small triangles
-Place triangles on non-stick baking sheet and bake for 8 to 10 minutes
-You will know they are done when the edges are crispy
-Once the tortilla triangles are finished in the oven, place a serving on a plate.
-Top the triangles with fresh diced strawberries
-Drizzle chocolate on top of the strawberries and triangles
-Top the entire dessert with some whipped cream
*Suggestions
-You can fry the triangles and then sprinkle cinnamon and sugar on them, but this is a "healthified" version and how we do it in our household.
-The tortillas we used were low carb/high fiber, which gave them a nutritional edge. A little fiber never hurts anyone. :)
-You could probably use all kinds of different fruits, but we chose to use strawberries.
Enjoy :)
Tuesday, July 26, 2011
2 recipes: Soy Glazed Carrots and Oven Fried Okra
Here are two side dish recipes that we tried tonight. First, I love carrots, but don't know how to cook them on their own. I usually roast them with several other vegetables or throw them in soups/stews/roasts. This recipe sounded like it would be tasty, so I decided to try it out tonight. We thought the carrots were really good. I am sure you could change up the recipe to make it your own.
I was raised in the South, which means that fried okra was a common side dish at several places. I absolutely love okra, but NEVER make it because the only way I know how is to fry it up in a skillet. I searched for a healthier version of "fried okra" and this was my first attempt. We thought it was decent but I think I will try a few things differently next time.
Soy Glazed Carrots
Serves 4
Original Recipe: http://www.foodandwine.com/recipes/honey-and-soy-glazed-carrots
Ingredients:
1 pound fresh whole carrots - peeled and sliced into chunks or sticks
1 tablespoon light margarine - melted
1 tablespoon honey
1 1/2 tablespoons soy sauce - I used the lower sodium soy sauce
Directions:
-Preheat oven to 400 degrees
-On a non-stick baking sheet, spray non-stick cooking spray
-In a bowl, combine sliced carrots, melted butter, honey, and soy sauce and mix until well combined.
-Put carrots on baking sheet and bake for 15-25 minutes. Flip carrots once during cooking process.
-Our oven took exactly 20 minutes, which is when the carrots were cooked but still slightly crunchy, which is how we like them.
Oven Fried Okra
Serves 4
Ingredients:
1 bag frozen cut okra - not the breaded kind
8 tablespoons cornmeal
2 eggs or 1/2 cup eggbeaters
1/4 cup skim milk
pepper
cajun seasoning or any other seasoning you wish to use
Directions:
-In a mixing bowl, combine eggs and milk and stir together. Set aside
-In another mixing bowl, add the cornmeal and any seasonings you wish to use and stir together.
-Preheat oven to 400 degrees.
-On a baking sheet, spray with non-stick cooking spray.
-Take a few pieces of okra at a time and place in the egg/milk mixture and then dip in cornmeal mixture. Set on baking sheet
-Repeat process until all okra is breaded and on baking sheet.
-Bake for approx 20-25 minutes, making sure to flip okra at least once during cooking process.
*Modifications/Suggestions
-Next time we make this dish, I intend to dip the okra in the egg mixture, then cornmeal mixture, and then repeat the process 1 more time for each batch of okra. This will give it more of a crust and will make it taste more like "fried" okra.
-For a healthier type of okra, this dish was definitely not bad.
Enjoy :)
Monday, July 25, 2011
Baked BBQ Turkey Meatballs
The heat has been so bad for the last 10 days, so grilling has not been an option for us. I've been cooking up lots of foods that can go in the oven. This is a simple recipe that I came up with on my own. These meatballs can be served several different ways, which is always a nice thing. I plan on serving these meatballs with some pinto beans with diced jalapenos in them and some diced watermelon chunks.
Baked BBQ Turkey Meatballs
Serves 4
Ingredients:
1 pound Butterball Ground Turkey Breast
1/2 diced red onion
2 teaspoons lower sodium worcestershire sauce
Ground Pepper
Salt - if you wish to use as seasoning; I didn't use any
1/2 - 1 teaspoon garlic powder
A few dashes of crushed red pepper flakes
1 egg white
1/4 cup plain breadcrumbs or oats
3/4 cup lower calorie bbq sauce
Directions:
-Preheat oven to 350 Degrees
-In a large bowl, combine the ground turkey breast, diced onion, worcestershire sauce, pepper, garlic powder, red pepper flakes, egg white, and breadcrumbs and mix well.
-Make meatballs with the mixture. You can determine how big or small to make them.
-Line a baking sheet with foil and spray with non-stick cooking spray (you don't have to cover it with foil, but it makes for very easy clean-up)
-Place meatballs on the baking sheet and cover each one with bbq sauce.
-Bake approx 20-25 minutes or until done.
-I use a meat thermometer to make sure all my meat is cooked to the appropriate temperature.
*Recommendations/Modifications
-You can use ground turkey, you don't have to use ground turkey breast. I just use it because it is lower in fat and healthier for you.
-The egg white and breadcrumbs are used in this mix to help keep the meatballs together. Also, turkey can be dry, so the egg helps keep it moist.
-These would also cook well in a crock pot. You would probably want to make the meatballs large and cover them with more bbq sauce, so they don't get overcooked or dry out. They would probably only take a few hours also.
Sunday, July 24, 2011
I've been baking all day...
I've been baking all day because tomorrow is my boss's birthday. I've decided to surprise him in the morning with a birthday breakfast with a bunch of co-workers. Here is what I decided to make/buy:
Multi-Grain English Muffins with Homemade Bacon Butter (Bacon Butter recipe is from Bunsinmyoven.com)
Bagel Thins with Low-Fat Pumpkin Cream Cheese (pumpkin cream cheese recipe is from skinnytaste.com)
Low-fat Strawberry Dannon Light and Fit Yogurt
Fresh Fruit (strawberries, sweet red cherries, grapes, pineapple, and apple slices)
Lil Smokies
Bacon and Cheddar Scones (recipe comes from bunsinmyoven.com)
Homemade Blueberry Muffins (see my recipe index for my blueberry muffin recipe)
Cherry and Caramelized Banana Mini Tartlets
Mini Vanilla Cake Donuts with Almond glaze (http://allrecipes.com/Recipe/fluffy-cake-doughnuts/detail.aspx)
Mini Chocolate Cake Donuts with Ganache Glaze (http://recipes.ireallylikefood.com/730119430/mini-chocolate-cake-donuts-/)
Mini Cinnamon Donuts with Maple Glaze (recipe is from For the Love of Cooking blog; http://fortheloveofcooking-recipes.blogspot.com/2011/01/homemade-baked-cinnamon-mini-donuts.html)
Orange Juice
Coffee
I think he will be very pleased with the spread. See some pictures below of what I made. Sorry they are not very good.


Bacon Butter:

Multi-Grain English Muffins with Homemade Bacon Butter (Bacon Butter recipe is from Bunsinmyoven.com)
Bagel Thins with Low-Fat Pumpkin Cream Cheese (pumpkin cream cheese recipe is from skinnytaste.com)
Low-fat Strawberry Dannon Light and Fit Yogurt
Fresh Fruit (strawberries, sweet red cherries, grapes, pineapple, and apple slices)
Lil Smokies
Bacon and Cheddar Scones (recipe comes from bunsinmyoven.com)
Homemade Blueberry Muffins (see my recipe index for my blueberry muffin recipe)
Cherry and Caramelized Banana Mini Tartlets
Mini Vanilla Cake Donuts with Almond glaze (http://allrecipes.com/Recipe/fluffy-cake-doughnuts/detail.aspx)
Mini Chocolate Cake Donuts with Ganache Glaze (http://recipes.ireallylikefood.com/730119430/mini-chocolate-cake-donuts-/)
Mini Cinnamon Donuts with Maple Glaze (recipe is from For the Love of Cooking blog; http://fortheloveofcooking-recipes.blogspot.com/2011/01/homemade-baked-cinnamon-mini-donuts.html)
Orange Juice
Coffee
I think he will be very pleased with the spread. See some pictures below of what I made. Sorry they are not very good.


Cherry and Caramelized Banana Tartlets:

Pumpkin Cream Cheese

Bacon Butter:

Saturday, July 23, 2011
Chicken Carbonara
Last night my husband had plans to help his friend hook up his new surround sound system. I told them I would cook a homemade dinner while they did this, instead of us having to go out to eat. I decided to try a new recipe, Chicken Carbonara. I've never made this dish before and always wanted to try it. However, at restaurants this pasta is high in fat and calories. The recipe I am posting is a "healthified" version of the classic dish and it came out pretty tasty. The recipe comes from "For the Love of Cooking". I cooked the exact recipe last night but I already have ideas on ways to make it a little different. We were all satisfied with the dish and the guys ate seconds. I served this with a fresh salad with veggies from our garden, some roasted pan seared asparagus, wheat dinner rolls with garlic and parsley, and the chicken for the carbonara pasta.
Chicken Carbonara
Serves 6-8 people
Ingredients:
1 1/2 pounds boneless, skinless chicken breasts (thin-sliced)
McCormick's Garlic and Herb Grinder seasoning
sea salt
black pepper
Olive oil
4 ounces of Boar's Head Pancetta - diced into small chunks
1 shallot - finely diced
1 clove of garlic - finely diced
1 egg or egg substitute equivalent
1/2 cup of shredded parmesan cheese
Healthy Harvest whole wheat thin spaghetti noodles
1/2 cup of pasta cooking water
Directions:
Chicken-
*In a non-stick skillet, heat up a small amount of olive oil
*Season chicken with garlic and herb seasoning, pepper, and a pinch of salt
*Saute chicken in the pan until cooked
Pasta-
*Boil water in a large pot
*Add pasta and cook according to directions on the box of pasta
*Drain pasta, reserving 1/2 cup to 3/4 cup of the pasta water for the carbonara.
Carbonara-
*In a non-stick skillet, heat on medium-high heat and cook the pancetta until crispy and done
*While pancetta is cooking, in a small bowl combine the egg, pepper, and 1/4 cup of the parmesan cheese and stir together. Set aside.
*Once Pancetta is completely cooked, place it on a paper towel to soak up the grease and set aside.
*In the same skillet, add the diced shallots and garlic and cook until tender (just a few minutes)
*Remove the skillet from heat once those are done.
*Add spaghetti noodles and pasta water to the garlic and shallots.
*Add the egg mixture to the pan and stir continuously so the egg does not cook, but blends together with the pasta.
*Add in the pancetta and remainder of the parmesan cheese and stir together.
*Pour pasta in a serving dish and top with fresh parsley
*Put chicken on a serving dish next to the pasta
*Modifications
-I cooked this recipe exactly how I have it above. I kept the chicken out of the pasta dish, so that people could have their own piece of chicken rather than having to dig around the pasta to get enough.
-Next time, I will use 2 shallots and about 6 oz of pancetta
-I will also use 2 eggs and a little more parmesan cheese, so it is a creamier dish.
-I will also recommend throwing in some crushed red pepper flakes to the pasta dish when it is done.
Overall, I think you will really like this dish. Enjoy :)
Wednesday, July 20, 2011
Preview for week of 20-27 July
I do my grocery shopping every Wednesday afternoon, so my menu runs from Wednesday to Wednesday. I am headed to the store after work today. Just wanted to give a preview of some recipes to come this week.
This week I will be posting recipes for the following:
Creole Green Beans
Homemade Seasoned Fries with Garlic, Parsley, and Parmesan
Soy Glazed Carrots
Chicken Spaghetti Carbonara
BBQ Baked Turkey Meatballs
Hope you all have a great week. Happy Cooking! :)
This week I will be posting recipes for the following:
Creole Green Beans
Homemade Seasoned Fries with Garlic, Parsley, and Parmesan
Soy Glazed Carrots
Chicken Spaghetti Carbonara
BBQ Baked Turkey Meatballs
Hope you all have a great week. Happy Cooking! :)
Chicken Sauteed with Apples
I never could understand why people would cook meals that involved adding a meat and a fruit together, until I started experimenting and realized that a lot of dishes were tasty that had both ingredients mixed together. This recipe is a simple one and it tastes really good. With it being summertime, I try to incorporate lots of fresh fruits and vegetables into my meals. This is a great way to try apples in a different way. I served this dish with some homemade whole wheat dinner rolls and roasted carrots and baby red potatoes. I hope you like this recipe as much as I do.
Chicken Sauteed with Apples
Serves 4
Original Recipe from RealSimple.com
Ingredients:
4 boneless, skinless thin-sliced chicken breasts
1 tablespoon of olive oil
1 large Braeburn apple, cored and peeled, and cut into 1/2 inch slices
1 cup apple juice
1 large sweet onion sliced
1 garlic clove, minced
1/2 teaspoon of dried thyme or you can use fresh thyme
salt and pepper for seasoning
2 tablespoons dijon mustard
Directions:
-In a large skillet, heat olive oil over medium-high heat
-Place chicken breasts in the skillet and saute for about 3 minutes per side
-Add the apple slices, the apple juice, the onions, the garlic, the thyme, and salt and pepper and mix all together. Place a lid on top of the skillet.
-Simmer for about 8 minutes or until chicken is fork tender.
-Remove chicken, apples, and onions and place on a serving platter.
-Keep the juice in the skillet and bring to a boil.
-Add the dijon mustard and let the sauce reduce slightly (about 4-5 minutes on a medium heat)
-Pour the sauce over the chicken and serve.
*Modifications:
-The only thing I do differently in this recipe is use a no sugar added apple juice, which is a lot less sugar and calories than normal apple juice. The apples are sweet enough without having to add a bunch of sugar from normal apple juice.
Enjoy! :)
Steak Fingers with Jalapeno Cream Gravy
Ok, so I know this blog is supposed to be all about healthy recipes, but for today I am posting this amazing recipe that I just know you will love. Every now and then you have to indulge and this is definitely one of those recipes that screams "indulgence". I will post a healthy recipe after this post to make up for just how unhealthy this one probably is.
I came across this recipe one day and immediately knew I had to make it. I am not sure if anyone remembers but Dairy Queen used to sell steak finger baskets back in the early 90's. I have memories of my mom, my sister, and I always getting them when we ate at Dairy Queen. This brings me back to those days.
Steak Fingers with Jalapeno Cream Gravy
Serves 4
Original recipe from "Homesick Texan" (http://homesicktexan.blogspot.com/2011/01/steak-fingers-jalapeno-cream-gravy.html)
Ingredients:
1 1/2 pounds cube steak
1 1/2 cups of flour
1/2 teaspoon salt
1 teaspoon black pepper
1/4 teaspoon red cayenne pepper
2 eggs or egg substitute equivalent
1 cup of milk or buttermilk
canola oil for frying
2 jalapenos - seeded and cut in half lengthwise
2 cloves of garlic
2 tablespoons oil or bacon grease (I used 2 tablespoons of light butter instead of oil or grease)
2 tablespoons flour or cornstarch
1 1/2 cups of milk
1/4 teaspoon of ground cumin
salt
Directions:
For the gravy:
-Place garlic and jalapenos on baking sheet and place under the broiler for no more than 5 minutes
-Remove from the oven and dice up the garlic and jalapenos
-In a large non-stick skillet, heat 2 tablespoons of oil/grease/or butter on medium low heat.
-Whisk in 2 tablespoons of flour
-Slowly add in the milk and stir until it reaches a thick consistency, which takes a few minutes.
-You may not need the entire 1 1/2 cups of milk. If it gets too runny, you can add a little more flour to thicken it up.
-Add the diced jalapenos, garlic, pepper, and cumin and stir together. Taste to see if you need any other additional seasoning.
-Set aside on low heat and stir often.
For the Steak fingers:
-Cut the cube steak into strips. They should be thicker strips, not skinny.
-In a bowl, combine the flour, salt, pepper, and cayenne pepper.
-In a small bowl, combine the eggs and milk and stir together.
-Take each strip of steak and do the following:
Dip in the flour mixture, then into the egg/milk mixture, and then back into the flour mixture
-Set all aside on a plate after they have all been breaded.
-In an electric skillet or large skillet, place about an inch of oil in the bottom of the pan and heat to about 300 degrees or so.
-Place your steak strips into the skillet and cook on the first side for about 3-4 minutes. You can cover your electric skillet to cook them faster.
-Then flip the steak strips and cook until the meat thermometer reads at least 165 degrees.
-On a plate, put some paper towels on it to put the cooked steak strips on and soak up some of the oil from the cooking process.
Serve the strips with the Jalapeno Cream Gravy.
*Modifications:
-I used white whole wheat flour for this recipe
-I used skim milk instead of whole milk or buttermilk
-I used egg substitute instead of 2 eggs
-I used light margarine instead of oil or grease
-I try to use the least amount of oil when frying these steak strips up. I blot all of them with several paper towels to remove the excess oil from frying.
Enjoy! These are seriously very tasty. Just don't go overboard because they are not the healthiest of meals. :)
Thursday, July 14, 2011
Jalapeno and Pepper Cheddar Bread
I decided to make this bread recipe because I had lots of fresh red and green bell peppers, as well as jalapenos, from my garden that needed to be used before they went bad. This recipe turned out absolutely scrumptious! The original recipe is from "Homemade by Holman" (http://homeiswheretheholmansare.blogspot.com/2010/01/jalepeno-cheddar-bread.html)
I found this recipe just searching through cooking blogs and am so glad I found a good bread recipe that my husband would absolutely go nuts over. He couldn't get enough of this. I hope you and your family enjoy it.
Jalapeno and Pepper Cheddar Bread
Serves 12-14 (small slices)
Ingredients:
2 cups all-purpose flour
2 tsp sugar
1 tablespoon baking powder
1 tsp freshly ground black pepper
1 tsp salt
1 cup shredded sharp cheddar cheese
1 cup milk (I used 1/2% milk)
1/3 cup pure canola oil
1 large egg
3 jalapeno peppers, seeded and diced
1/2 cup green bell pepper, diced
1/2 cup roasted red pepper, diced
Directions:
1) Preheat oven to 375 Degrees
2) Spray a 9 x 5 inch loaf pan with nonstick cooking spray
3) In a large bowl, combine the flour, sugar, baking powder, pepper, salt, and cheese.
4) In a separate small bowl, combine the milk, canola oil, and large egg and mix well.
5) In the large bowl, make a well in the center of the flour mixture and pour the milk mixture in the middle of the well.
6) Combine the wet and dry mixture just until blended.
7) Add jalapeno peppers and red and green bell peppers and stir gently to combine.
8) Batter will be lumpy
9) Pour batter into loaf pan and bake for 45 minutes or until golden brown on top and a toothpick inserted comes out clean.
10) Cool before slicing and enjoy! :)
*Modifications
- Instead of all purpose flour, I used white whole wheat flour to boost the whole grains in this recipe
- I used fat free shredded cheddar cheese to reduce the fat and calories in this recipe
- I added 4 jalapenos, not 3. It gave it more of a kick.
Wednesday, July 13, 2011
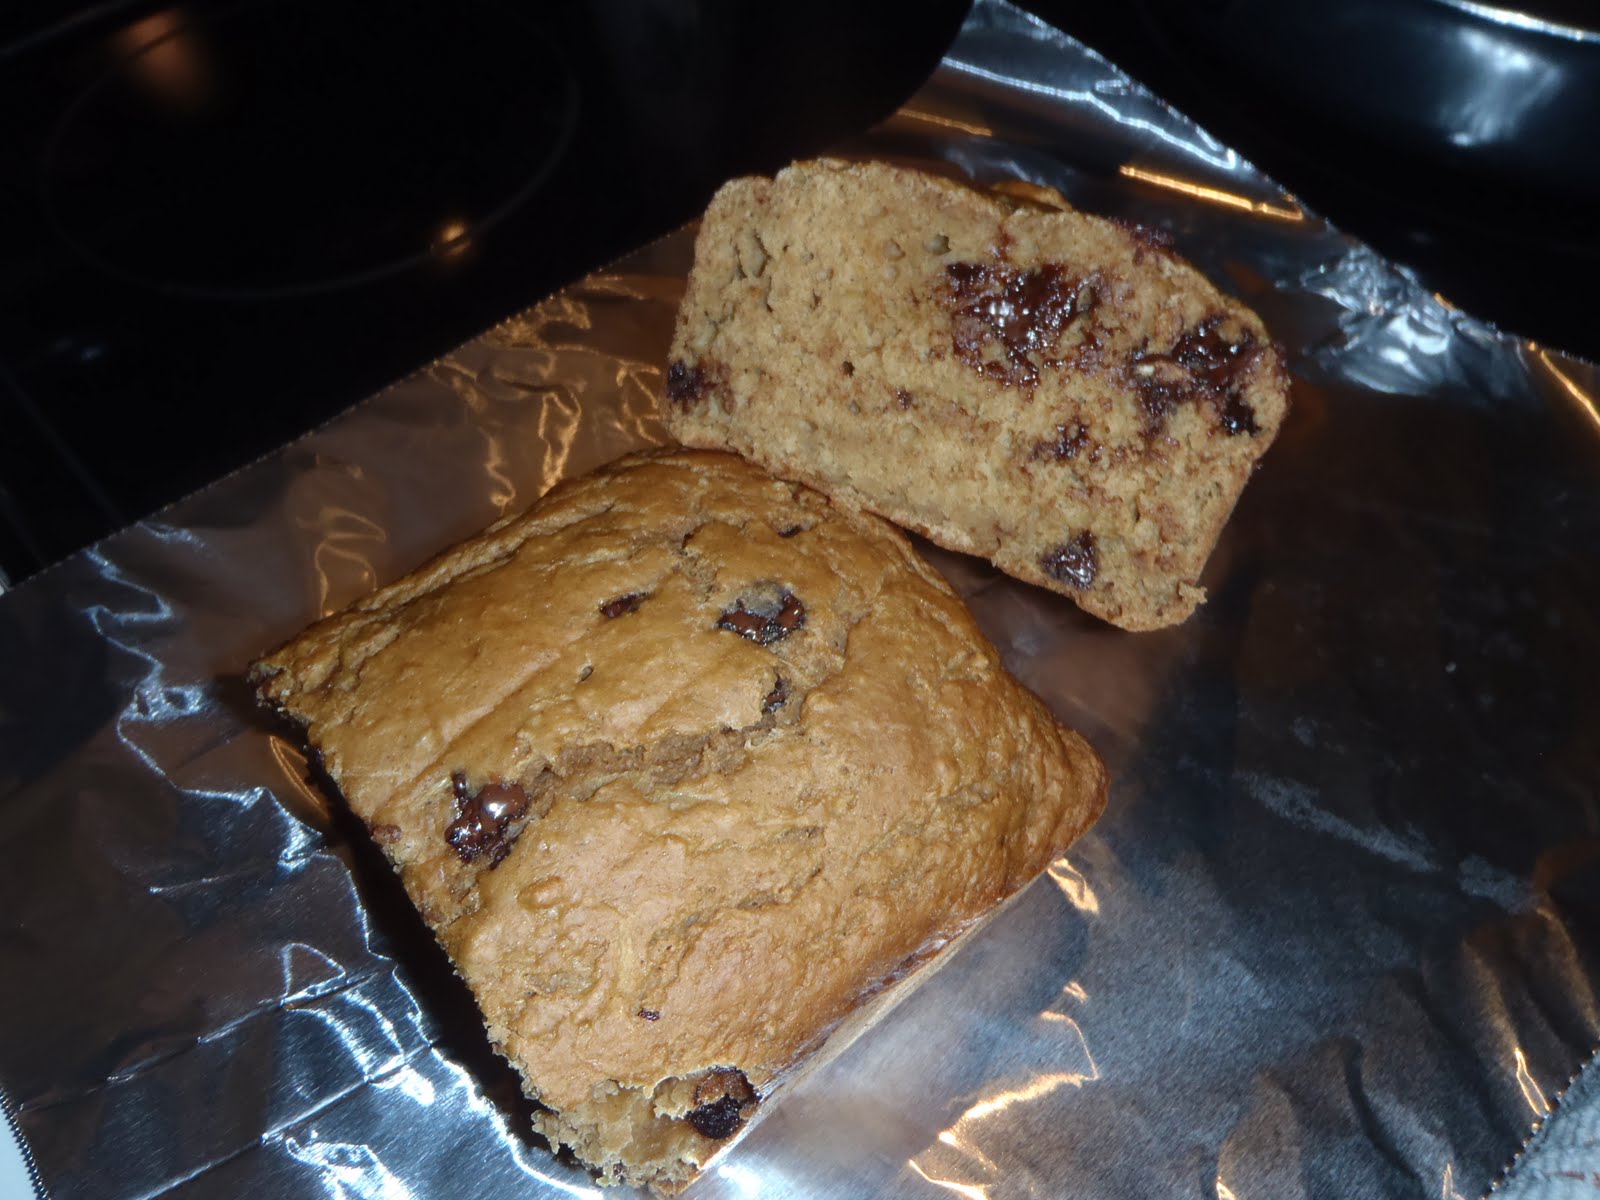
Low-Fat Chocolate Chip and Zucchini Bread
Tonight I was a baking fool. I decided to try 2 new bread recipes because I had tons of fresh veggies from the garden to use up. I've never made either recipe before and both were very successful, at least in my household. We only tried a little sliver because the plan is to take them to work tomorrow and share with our co-workers.
Low-Fat Chocolate Chip and Zucchini Bread
Serves 12-14 (small slices)
Original recipe from skinnytaste.com (http://www.skinnytaste.com/2011/07/low-fat-chocolate-chip-zucchini-bread.html)
Ingredients:
1 cup all purpose flour
1 cup white whole wheat flour
1/2 cup brown sugar (not packed)
1 1/8 teaspoon baking soda
1 teaspoon vanilla
1/2 teaspoon salt
1/2 cup semisweet chocolate chips
1 large egg beaten
2 tablespoons light butter melted
1 cup No sugar added applesauce
1 1/2 cups shredded zucchini (not packed)
1 teaspoon ground cinnamon (I added this; it is not in the original recipe from skinnytaste.com)
Directions:
1) Preheat oven to 325 degrees
2) Combine flour, sugar, baking soda, cinnamon, and salt in a large bowl and mix together.
3) Add chocolate chips gently to the batter.
4) In a separate bowl, add beaten egg, vanilla, melted butter, applesauce, and zucchini together.
5) Add the combined mix to the flour mixture and mix gently together. You want the batter to be a little lumpy. Do not over stir.
6) Pour mixture into a 9 x 5 non-stick loaf pan.
7) Bake for 45-55 minutes. You will know when it is done when a toothpick is inserted and it comes out clean. My loaf took 50 minutes.
8) Cool before slicing/storing
*Suggestions:
-The only thing I did differently with the original recipe is add cinnamon. It turned out very delicious with the added ingredient.
I enjoy this recipe because it is a healthier dessert loaf because it has whole wheat flour, which gives you your whole grains, and it has tons of healthy zucchini in it. Also, the applesauce instead of oil gives it added nutritional benefits.
Sorry for the crappy photos. I will get better at this. Promise!

Tuesday, July 12, 2011
Mexi-Corn Dip
Bryan and I went to a friend's house for a 4th of July party and one of the other people that attended brought this amazing mexi-corn dip. Everyone at the party kept saying how good it was and going back for seconds because it was so tasty. She told me she would give me the recipe and that I could put it on my blog. Her name is Jenny and this is her recipe. It's fabulous! :)
Mexi-Corn Dip
Serves 12-16 people
Ingredients:
2 cans Mexi-corn drained
16 oz. sour cream ( I use fat free)
1 cup mayo/miracle whip
1 small can chopped green chilies (4oz)
1/2 small can chopped jalepenos or fresh jalepenos
8 oz shredded cheese
1 bunch chopped green onions- optional
Directions:
Mix all ingredients and refrigerate several hours or overnight. Serve
with Frito's Scoops.
*Modifications
-I have since made this recipe and changed a few things to make it my own:
1) Instead of a cup of mayo/miracle whip, I used 1 cup of plain nonfat yogurt
2) I used fresh jalapenos and added about 1/2 cup of finely diced jalapenos but we like things spicy in our house
3) I used low fat shredded cheddar cheese
4) Instead of green onion, I added some finely diced red onion.
5) I added in a dash of cumin and chili powder to spice it up.
6) Instead of serving with frito lays scoops, we used the Tostitos multigrain tortilla chip scoops and they worked wonderfully with this dish.
The great thing about this dip is that you could change it so many ways to make it your own. Enjoy! :)
Friday, July 8, 2011
Corn and Edamame Succotash
About a month ago, I met a bunch of girlfriends for dinner at "Cheeseburger In Paradise". I got this amazing chicken dish and instead of fries, I got their vegetable of the day. It was a corn and edamame succotash and I absolutely loved it. I knew immediately I would try to make it at home. I cooked this tonight for dinner, along with some grilled bbq pork chops and salad. It was very tasty. My husband said I definitely needed to post this. I'll give you the recipe I used tonight and then let you know some modifications I plan on trying next time.
Corn and Edamame Succotash
Serves 4
Ingredients:
1 bag of frozen shelled edamame (I used VIP shelled edamame)
1 bag of frozen sweet corn (I used VIP Steamfresh sweet corn)
1/2 red bell pepper - diced to a fine chop
1/2 green bell pepper - diced to a fine chop
1/2 medium red onion - diced to a fine chop
1 tsp minced garlic
1 tsp olive oil
1 tablespoon light margarine or butter
sea salt and black pepper for seasoning
Directions:
-Cook edamame according to package
-Cook corn according to package
-In a saute pan, add olive oil and heat up.
-Add red and green bell pepper, red onion, and garlic and saute in pan for just a few minutes
-Add minced garlic to mixture
-Add cooked edamame and corn and stir all together
-Add about 1 tablespoon of butter and season with salt and pepper
*Modifications:
-I plan on adding some diced jalapeno's next time I make this dish. I think it would be really good.
-At the end of making this dish, I sprinkled in a small amount of crushed red pepper and it was a nice compliment to the dish.
Enjoy :)
Sorry if these pictures aren't very pretty but I wanted you to see what it looks like. I drizzled bbq sauce on top of the meal but didn't take a picture of that.


Wednesday, July 6, 2011
Roasted Bacon Wrapped Green Beans
I am always trying to come up with new recipe ideas when it comes to how to cook veggies. I think most people find vegetables boring or don't realize all that you can do with them. This is a super easy and delicious recipe that I found on another cooking blog and had to share with all of you. Not only does this dish taste amazing, it also looks really cute when you put them on a serving platter. While some of you might be thinking that the bacon makes these unhealthy, that is simply not the case. This is a nutritious side dish that would go nicely with all sorts of entrees. I am serving this side dish tonight with some salad, mashed sweet potatoes and grilled bbq chicken breasts.
Original Recipe from "Meghan in the Kitchen...With a Baby On the Way" (http://meghaninthekitchen.blogspot.com/)
Roasted Bacon Wrapped Green Beans
Serves 6-8 people
Ingredients:
1 pound fresh green beans - cleaned and ends snapped off
6-8 slices of bacon - each slice should be cut in half
Black Pepper
Garlic Powder
Brown Sugar
1 tablespoon Light Margarine
Directions:
-Preheat oven to 325 degrees
-In a pot, add water and bring to a boil
-Once water is boiling, add fresh green beans and blanche them for 3-4 minutes
-Remove from water and set aside for preparation
-On a non-stick baking tray or 9 x 13 casserole dish, spray some non-stick cooking spray on the bottom
-Grab between 5 and 8 green beans and wrap half a piece of bacon around the middle of the bundle and lay seam side down on baking tray/casserole dish.
-Repeat process until all green beans have been wrapped in bundles with bacon around each of them.
-Make sure you leave a little room in between each of the bundles on the tray/casserole dish.
-In a small saucepan, melt 1 tablespoon of butter and add 1 tablespoon of brown sugar. Brush butter/brown sugar mixture on top of each piece of bacon wrapped green bean bundle.
-Sprinkle garlic powder and pepper on each of the bacon wrapped green bean bundles.
Bake for 15-20 minutes in the oven. You will know when they are almost done by looking at the bacon. It will be cooked and the green beans will look roasted. You can put the tray under the broiler for a few minutes if you need or want to crisp up the bacon after roasting them for 15-20 minutes.
*Suggestions
-To make this dish a healthier version, I would use center cut/lower fat bacon or turkey bacon. I believe the turkey bacon would alter the taste quite dramatically but lower fat bacon would be just fine. That is what we use in our house.
-I also use the Splenda brown sugar blend, instead of regular brown sugar and it works very well.
-You could do other veggies with this recipe. I am thinking of trying out asparagus next time.
Enjoy! :)
Monday, July 4, 2011
4th of July Trifle
This recipe comes from Gina's Skinny Recipes (http://www.skinnytaste.com/2011/06/red-white-and-blueberry-trifle.html). I saw this recipe about a week ago and thought it would be perfect for the holiday.
Being that today is the 4th of July, this dessert definitely shows its patriotism. :) This is a simple, delicious dessert that is perfect for a backyard bbq. We have plans with friends tonight and this is what we are taking for the bbq. I also love this dessert because it has fruit in it, which is always a big bonus in my opinion. When you think of bbq's, you don't necessarily think about eating healthy/nutritiously. This allows you to enjoy something sweet, but a little healthier than something like pie, cookies, or cakes.
I didn't change anything in this recipe, so this is the same recipe that is on Gina's cooking blog.
Recipe:
Serves 12-14 people
Ingredients:
Angel Food Cake - at least 10 oz
2 pints of strawberries - sliced
2 pints of blueberries
6 tablespoons of fat-free sweetened condensed milk
1 1/2 cups of cold water
1 small package of Sugar Free White Chocolate instant Pudding
1 12oz fat free cool whip - thawed
Directions:
-Cut angel food cake into small squares
-Wash and dry off strawberries and blueberries
- In a bowl, combine the sweetened condensed milk and water and stir well.
-Add package of sugar free white chocolate pudding mix and stir for about 2 minutes.
-Gently combine thawed cool whip with mixture.
-In a trifle bowl, put half the angel food cake squares in the bottom of the bowl.
-Add about 1/2 of the blueberries
-Add 1/2 of the pudding mixture on top of that
-Add about 1/2 of the strawberry slices on top of the pudding mixture.
-Repeat procedure with remaining ingredients.
-You can get creative with the top of the trifle and decorate it how you wish.
-Cover and refrigerate for no less than an hour.
*Suggestions
-I used a sugar free angel food cake from the Walmart Bakery
-I think you could use different flavors of pudding mix with this recipe. I think next time I will try it with french vanilla pudding or cheesecake flavored pudding.
Below are pictures of what mine looks like.
Enjoy! :)


Subscribe to:
Posts (Atom)